Your cart is currently empty!
Author: Amit Kumar
Step-by-Step Guide: How to Install SSL on IIS 8 and Later
Part 1: Generate CSR and Private Key
- Access the CSR Generator:
- Go to RunSSL.com’s CSR Generator.
- Complete the Form:
- Fill in the form with accurate information using standard characters.
- Download Your CSR:
- Click the blue button to download your CSR in txt format.
- Save Your CSR:
- Keep the downloaded CSR file in a secure location; you’ll need it during the SSL certificate ordering process.
- Utilize SHA 256 Algorithm:
- Rest assured; our generator employs the secure SHA 256 Algorithm.
- Combined CSR and Private Key:
- Both your CSR and Private Key are conveniently combined in the same file. Use it wisely.
Part 2: Purchase and Install SSL Certificate
- Purchase Your SSL Certificate:
- Choose a suitable SSL certificate, for example, PositiveSSL DV.
- Provide CSR During Order:
- During the ordering process, you’ll be prompted to input your CSR. Use the saved CSR file from Part 1.
- Download Issued SSL Certificate:
- Once issued, download your SSL certificate and save it securely.
Part 3: Install SSL Certificate on IIS
- Access IIS Manager:
- Launch IIS Manager and click the server name in the Connections menu.
- Open Server Certificates Manager:
- On the server’s Home page, double-click Server Certificates in the IIS section.
- Open Complete Certificate Request Wizard:
- On the Actions menu, click “Complete Certificate Request…”
- Specify Certificate Authority Response:
- Click the … button to locate your certificate. Add it to IIS.
- Specify a Friendly Name for easy identification.
- Select Web Hosting as the certificate store and click OK to import.
- Click the … button to locate your certificate. Add it to IIS.
- Set Certificate Bindings:
- Return to the server home page in IIS. In Connections, expand Sites and click the site needing SSL.
- In the Actions menu, click “Bindings…”
- For new installation, click Add. For replacements, click Edit.
- In the Add Site Bindings window:
- Type: https
- IP Address: Select your site’s IP Address or All Unassigned.
- Port: 443
- Host Name: Not required for a single-name certificate.
- If installing on multiple sites, enter the domain for each site.
- SSL Certificate: Select your site’s certificate from the drop-down.
- Click OK when configured.
- Restart IIS:
- For changes to take effect, restart IIS. You can do this in the Actions pane by clicking on “Restart.”
- Test Your SSL Installation:
- Open your website using “https://”. A secure padlock icon should indicate successful installation.
Congratulations! Your website is now fortified with SSL. Check for the padlock on your site or use an online SSL Checker tool for verification. Your website is secure, ensuring a safe user experience.
- Access the CSR Generator:
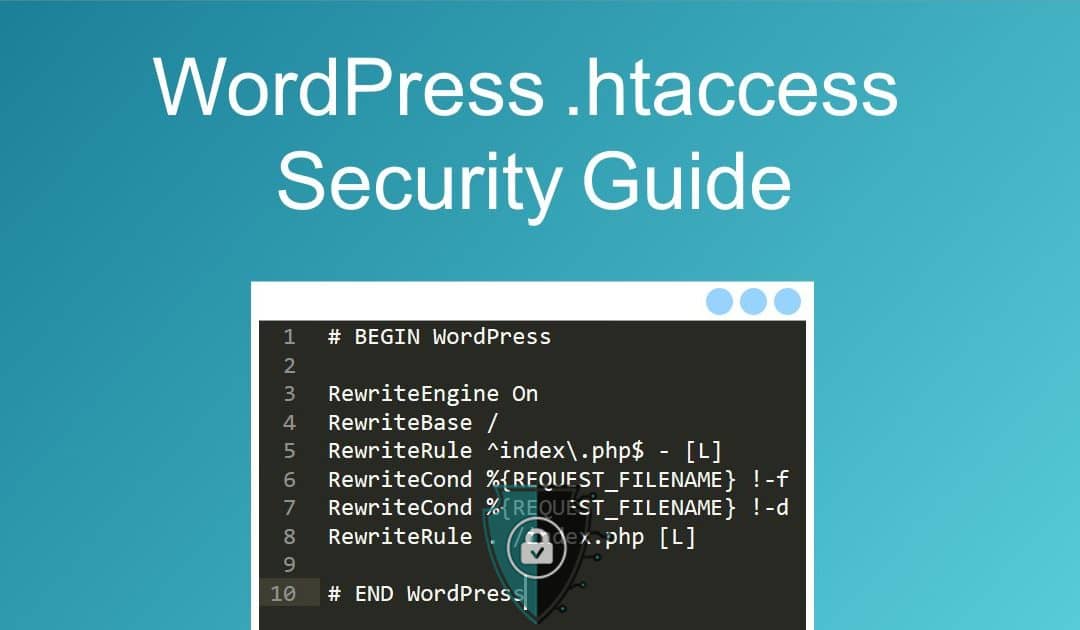
Fortifying Your WordPress Castle: A Guide to .htaccess Security
As a WordPress website owner, you’re entrusted with the valuable data of your visitors and your own. Protecting this information is paramount, and one powerful tool at your disposal is the
.htaccess
file. This unsung hero resides in the root directory of your WordPress installation, silently guarding your digital fortress against malicious invaders.While plugins offer convenient solutions for website security, .htaccess offers a more granular control. Understanding and utilizing its capabilities can significantly enhance your website’s defenses, making it a castle no digital thief would dare to breach.
Htaccess: Your Secret Weapon in the Security Arsenal
Imagine a gatekeeper at the entrance of your castle, scrutinizing every visitor before granting them access. That’s essentially what .htaccess does. It acts as a gatekeeper, controlling access to your website’s files and directories, ensuring only authorized individuals can enter.
.htaccess (Hypertext Access) is a configuration file used by web servers to control the directory it resides in and its subdirectories. It allows you to override server settings and enhance the security of your WordPress site.
1. Backup Before You Tweak:
Before making any changes to your .htaccess file, it’s crucial to create a backup. This simple precaution ensures that you can easily revert to a previous state if something goes awry.
2. Limit Access to wp-admin:
One effective way to fortify your WordPress login page is by restricting access to wp-admin. You can achieve this by adding the following code to your .htaccess file:
<Files wp-login.php>
Order Deny,Allow
Deny from all
Allow from xxx.xxx.xxx.xxx
</Files>Replace
xxx.xxx.xxx.xxx
with your own IP address. This way, only your specified IP address can access the login page.3. Protect Against SQL Injection:
Guarding your website against SQL injection attacks is crucial. Add the following code to your .htaccess to filter and sanitize user inputs:
# SQL Injection Protection
<IfModule mod_rewrite.c>
RewriteEngine On
RewriteCond %{QUERY_STRING} (\<|%3C).*script.*(\>|%3E) [NC,OR]
RewriteCond %{QUERY_STRING} GLOBALS(=|\[|\%[0-9A-Z]{0,2}) [OR]
RewriteCond %{QUERY_STRING} _REQUEST(=|\[|\%[0-9A-Z]{0,2})
RewriteRule ^(.*)$ index.php [F,L]
</IfModule>4. Prevent Directory Listing:
By default, directories that lack an index file will display a list of their contents. To prevent this, add the following code:
# Disable directory listing
Options -Indexes5. Enable HTTPS:
Secure your site by forcing HTTPS. This not only encrypts data transmission but is also favored by search engines. Insert the following code:
# Force HTTPS
RewriteEngine On
RewriteCond %{HTTPS} off
RewriteRule ^ https://%{HTTP_HOST}%{REQUEST_URI} [L,R=301]
6. Limit File Upload Size:
Prevent potential threats by limiting the size of file uploads. This can be particularly useful in mitigating denial-of-service attacks. Add the following lines to your .htaccess file:
# Limit file upload size
php_value upload_max_filesize 10M
php_value post_max_size 10MIn the vast landscape of the internet, your WordPress website stands as your digital representation. Fortifying it against potential threats is not just a technical necessity but a humane responsibility to your users and visitors. By making judicious use of .htaccess, you can bolster your website’s defenses without compromising on user experience.
Remember, security is an ongoing process. Regularly update your WordPress installation, plugins, and themes, and stay informed about the latest security practices. Your website’s security is not just a line of code; it’s a shield that safeguards the trust your users place in you.
Common SSL/TLS errors and how to fix them: A friendly guide to securing your website
In today’s digital world, where trust and security are paramount, having a secure connection for your website is non-negotiable. This is where SSL/TLS certificates come in, playing a vital role in encrypting data and safeguarding your online presence. However, even with the best intentions, unexpected errors can arise, causing frustration and hindering your website’s functionality. Don’t worry! This guide will be your friendly companion in troubleshooting and fixing those pesky SSL/TLS errors, ensuring your website shines with a secure glow.
Let’s first understand what SSL/TLS errors are:
These errors are essentially roadblocks encountered during the handshake process between your website and a visitor’s browser. They typically manifest as warning messages or a complete lack of connection, causing confusion and hindering user experience.
Common SSL/TLS Errors:
- SSL/TLS Handshake Failure:
- Cause: Mismatched protocols, expired certificates, or incompatible cipher suites.
- Solution: Ensure the server supports the requested protocol, update certificates, and verify cipher suite compatibility.
- SSL Certificate Expired:
- Cause: The SSL certificate has reached its expiration date.
- Solution: Renew the SSL certificate promptly and update it on the server.
- Mismatched Common Name:
- Cause: The domain in the SSL certificate does not match the actual website domain.
- Solution: Obtain a certificate with the correct common name or update DNS settings.
- Mixed Content Warnings:
- Cause: Loading insecure (HTTP) content on a secure (HTTPS) page.
- Solution: Update all content to load securely or consider using Content Security Policy (CSP). You may check it here https://www.runssl.com/ssl-tools/why-no-padlock
- Insecure SSL/TLS Version:
- Cause: Use of outdated or vulnerable SSL/TLS versions.
- Solution: Upgrade to the latest TLS version supported by your server.
- Cipher Suite Incompatibility:
- Cause: Browser and server support different cipher suites.
- Solution: Configure the server to support commonly accepted cipher suites.
- Revoked SSL Certificate:
- Cause: The certificate authority (CA) has revoked the SSL certificate.
- Solution: Obtain a new SSL certificate from a trusted CA.
You may Review your SSL Certificate’s Installation
Some errors may look like this:
- NET::ERR_CERT_DATE_INVALID: This error indicates that your SSL/TLS certificate has expired. Solution: Renew your certificate before it expires.
- ERR_SSL_VERSION_OR_CIPHER_MISMATCH: This error occurs when your website and browser are not communicating using compatible security protocols. Solution: Update your website’s configuration to support newer protocols.
- SSL_ERROR_RX_RECORD_TOO_LONG: This error indicates issues with the data being transmitted between your website and the browser. Solution: Check your server configuration and ensure proper data transmission.
- SEC_ERROR_UNKNOWN_ISSUER: This error occurs when the browser doesn’t recognize the issuing certificate authority (CA). Solution: Use a trusted CA for your certificate issuance.
- ERR_CERT_AUTHORITY_INVALID: This error indicates problems with the chain of trust for your certificate. Solution: Verify that your intermediate certificates are installed correctly.
Remember:
- Preventative measures: Regularly check your SSL/TLS certificate expiration date and renew it before it expires.
- Choose a trusted CA: Opt for a reputable certificate authority with a proven track record of security and reliability.
- Stay updated: Keep your server software and operating system updated with the latest security patches.
- Seek help: Don’t hesitate to contact your hosting provider or a qualified technician for assistance with complex issues.
By following these tips and taking proactive measures, you can ensure your website remains secure and accessible to all visitors. Remember, a secure website fosters trust and confidence, ultimately contributing to your online success. So, go forth and conquer those SSL/TLS errors, and keep your website shining brightly with a secure, trustworthy glow!
- SSL/TLS Handshake Failure:
How to Generate CSR and Private Key for an IP Address
In the realm of secure online communication, generating a Certificate Signing Request (CSR) and a private key is a crucial step in obtaining an SSL certificate. While it’s common to associate SSL certificates with domain names, there are scenarios where you might want to secure communication using an IP address. Here’s a step-by-step guide on how to generate a CSR and private key for an IP address.
Steps to Generate CSR and Private Key for an IP Address
- Log in to Your Hosting Service: Start by logging in to your hosting service provider’s client area. Navigate to the services section where your SSL service is located.
- Choose SSL Service: In the services section, locate your SSL service and select it.
- Create CSR and Private Key: Look for the option to create a CSR and private key. Click on it to initiate the process.
- Fill in Details: Fill in the necessary details for the CSR, including the IP address for which you are generating the certificate. Provide accurate information as it will be embedded in the certificate.
- Generate CSR: Once you’ve filled in the details, proceed to generate the CSR. This process will also create the associated private key.
- Store Private Key Securely: After generating the CSR and private key, it’s crucial to store the private key securely. Keep it in a safe location on your server and avoid sharing it with unauthorized individuals.
Why Secure an IP Address?
Securing communication with an IP address is essential in scenarios where a dedicated IP is used for specific services, and a domain name isn’t practical. This is common in situations where direct access to the server via IP is required, such as accessing an application or service hosted on a server without a domain name.
Benefits of Generating CSR and Private Key for an IP Address
- Direct Server Access: Securing an IP address allows for secure communication with the server directly, ensuring data integrity and confidentiality.
- No Dependency on Domain Names: In cases where using domain names is not feasible, such as accessing services via a public IP, securing the IP directly provides a viable solution.
- Streamlined Setup Process: Generating a CSR and private key for an IP address streamlines the setup process, especially in scenarios where domain names are not yet configured.
Conclusion
Securing communication with an IP address is a practical necessity in certain scenarios. By following the steps outlined above, you can generate a CSR and private key to obtain an SSL certificate for an IP address. Remember to store the private key securely and adhere to best practices for online security.
SSL Certificate for IP Address: Enhancing Security and Trust
In the ever-evolving landscape of cybersecurity, securing your online presence is paramount. One crucial aspect is the implementation of SSL certificates, which not only encrypt data but also contribute to building trust among users and search engines. In this comprehensive guide, we’ll delve into the significance of SSL certificates for IP addresses, with a focus on the Positive SSL range available at RunSSL.
Understanding SSL and Its Role
SSL, or Secure Sockets Layer, is a standard security protocol for establishing encrypted links between a web server and a browser. This encryption ensures that all data transmitted between the server and the browser remains private and integral. Traditionally, SSL certificates were associated with domain names. However, advancements in cybersecurity now allow for SSL certificates to be issued for IP addresses as well[4].
Why SSL for IP Addresses?
1. Enhanced Security
Implementing an SSL certificate for your IP address adds an extra layer of security to your online assets. It safeguards sensitive information, such as login credentials and personal data, from potential cyber threats and malicious actors.
2. Trust and Credibility
SSL certificates play a crucial role in establishing trust with your website visitors. When users see the padlock icon in their browser’s address bar, they feel more confident in sharing their information, leading to increased trust in your website.
3. Search Engine Optimization (SEO) Benefits
Search engines like Google consider SSL as a ranking factor. Websites with SSL certificates are more likely to rank higher in search results, positively impacting your online visibility[2].
Positive SSL at RunSSL
Now that we understand the importance of SSL for IP addresses, let’s explore the Positive SSL range available at RunSSL. Positive SSL certificates are known for their affordability, reliability, and quick issuance.
1. Affordability
RunSSL offers cost-effective Positive SSL certificates, making it an ideal choice for small businesses and individuals looking to secure their websites without breaking the bank.
2. Reliability
Positive SSL certificates provide robust encryption, ensuring that data transmitted between your server and users remains secure. The reliability of these certificates contributes to a seamless and trustworthy online experience for your visitors.
3. Quick Issuance
Time is of the essence, especially when it comes to cybersecurity. Positive SSL certificates from RunSSL are known for their quick issuance process, allowing you to secure your website promptly.
How to Obtain a Positive SSL Certificate for Your IP Address
Acquiring a Positive SSL certificate for your IP address is a straightforward process. Follow these general steps:
- Visit RunSSL’s Website: Head over to RunSSL to explore their range of Positive SSL certificates.
- Select the Right Certificate: Choose the Positive SSL certificate that aligns with your security needs and budget.
- Provide Necessary Information: Fill in the required details for certificate issuance, ensuring the accuracy of the information provided.
- Complete the Verification Process: Follow the verification steps to confirm ownership of the IP address.
- Install the Certificate: Once issued, install the SSL certificate on your server to enable secure connections.
Conclusion
Securing your online presence with an SSL certificate for your IP address is no longer optional—it’s a necessity. The Positive SSL range at RunSSL not only offers affordable solutions but also ensures the trust and security your website deserves. Implementing SSL is a proactive step towards a safer and more reliable online environment, benefitting both your users and your search engine rankings.
Invest in the security of your digital space today with Positive SSL from RunSSL, and witness the positive impact it brings to your website’s credibility and user experience.
The Essential Guide to Website Security in 2023: SSL Certificates and Beyond
In today’s digital landscape, website security is not a luxury—it’s a necessity. As cyber threats continue to evolve, and consumers become more security-conscious, businesses must prioritize safeguarding their online assets. In this comprehensive guide, we’ll delve into the core of website security: SSL certificates. We’ll also explore additional web security solutions that work in tandem with SSL to provide a robust defense against threats.
1. The Role of SSL Certificates in Securing Online Communications
SSL certificates serve as the bedrock of website security. They ensure that data exchanged between users’ browsers and your web server is encrypted, guaranteeing data privacy and building trust. The familiar padlock icon in the browser’s address bar signifies a secure connection.
2. A Comparison of SSL Certificate Providers
In the ever-expanding realm of SSL certificate providers, selecting the right one is a critical decision. We offer a range of trusted providers, each with its unique features and benefits.
- Digicert: A global leader in digital security solutions, renowned for excellence in security.
- Sectigo (formerly Comodo): A prominent name in the world of website security, known for robust protection.
- GeoTrust: A dependable choice for building trust with website visitors.
- Thawte: A trusted SSL certificate provider with a global reputation.
- RapidSSL: An affordable and speedy solution for website security.
The choice of SSL certificate provider depends on your specific security needs and the level of trust you aim to instill in your website visitors.
3. Importance of Regular Website Scans and Protection
SSL certificates are just the beginning of website security. To comprehensively secure your website, consider additional web security solutions like:
- SiteLock: Comprehensive website security solutions that encompass malware scanning, vulnerability detection, and automatic threat removal.
Regular website scans are vital to identify and eliminate any security vulnerabilities or malware that could compromise your website’s integrity.
4. Data Backup and Recovery Solutions
In the event of data loss or security breaches, data backup and recovery solutions are invaluable.
- CodeGuard: A reliable backup and recovery service ensuring your website data remains safe and can be quickly restored.
Data loss can be devastating. CodeGuard ensures that you can recover your website’s data quickly, minimizing downtime and potential data loss.
5. Building Trust and Credibility
Building trust with your website visitors is essential.
- TrustedSite: Trust badges that enhance your website’s credibility, fostering trust with visitors and increasing conversions.
Trust badges are a visible sign of your commitment to security and integrity, which can significantly impact user trust and engagement.
6. Continuous Monitoring and Threat Detection
For continuous monitoring and threat detection, consider:
- cWatch by Comodo: A holistic website security solution offering continuous monitoring, malware detection, and protection against cyber threats.
The digital landscape is constantly evolving, and cyber threats are becoming more sophisticated. cWatch ensures that your website is continuously monitored, and threats are detected and mitigated in real-time.
By integrating these web security solutions with SSL certificates, you’ll fortify your website’s security, protect against various online threats, and inspire confidence in your users.
Conclusion
In 2023, website security is not negotiable—it’s mandatory. SSL certificates form the bedrock of secure online communication. To create a robust security strategy, complement SSL with web security solutions like SiteLock, CodeGuard, TrustedSite, and cWatch. These tools fortify your online presence, ensuring your website remains safe and trustworthy. Ready to enhance your website security in 2023? Explore our range of SSL certificates and web security solutions to get started on the path to a more secure and trusted online presence.
SSL Certificate for Private Internal IP Address or Local Intranet Server Name
In an era where data security and privacy are paramount concerns, even internal networks and intranet systems within organizations need to be safeguarded. While SSL certificates are commonly associated with public-facing websites, they also have a crucial role to play in securing communication within private networks, using private internal IP addresses or local intranet server names.
Understanding the Need for SSL in Internal Networks:
Internal networks, often referred to as intranets, are used by organizations for various purposes like file sharing, internal websites, email servers, and more. Just because these networks aren’t exposed to the public internet doesn’t mean they should be devoid of security measures. Here’s why SSL is essential for these environments:
- Data Encryption: SSL encrypts the data exchanged between devices within the network. This prevents unauthorized access to sensitive information even within the organization.
- Authentication: SSL certificates help in authenticating the identity of devices or servers within the network, reducing the risk of man-in-the-middle attacks.
- Trust: When employees or users access internal resources, having a valid SSL certificate in place ensures trust and legitimacy, reducing the chances of phishing attacks.
Obtaining an SSL Certificate for Internal IP Addresses or Server Names:
To secure internal network communication, you can obtain an SSL certificate for a private internal IP address or a local intranet server name. Here’s how:
**1. Self-Signed Certificates: Organizations can create their own self-signed SSL certificates for internal resources. While this provides encryption, it doesn’t offer the same level of trust as certificates from trusted certificate authorities (CAs).
**2. Internal Certificate Authorities: Larger organizations often set up their internal certificate authorities to issue SSL certificates for internal use. This allows them to maintain control over certificates while maintaining trust.
**3. Public CA with Private IP SANs: Some public certificate authorities offer SSL certificates that include Subject Alternative Names (SANs) for private IP addresses or server names. This option combines the trust of a public CA with the specificity required for internal resources.
**4. Wildcard SSL Certificates: Organizations can opt for wildcard SSL certificates that cover multiple subdomains, including internal ones. This is useful if there are several internal servers to secure.
Considerations and Best Practices:
- When using SSL certificates for internal resources, it’s essential to keep them up to date. Expired certificates can lead to security vulnerabilities and operational disruptions.
- Implement certificate management practices to keep track of expiration dates, and consider automating certificate renewals.
- Ensure that your internal devices and servers are configured to use SSL for communication. This often involves configuring web servers, email servers, or VPN gateways to use the SSL certificate.
- Educate employees or users about the importance of SSL security within the internal network and the potential risks of ignoring SSL best practices.
Securing internal network communication with SSL certificates is a vital step in protecting sensitive data and maintaining the integrity of your organization’s digital infrastructure. Whether you opt for self-signed certificates, internal CAs, or certificates from trusted public authorities, the goal is the same: to ensure that even within your internal network, data remains confidential, secure, and trusted.
How to Redirect Drupal or Ubercart SSL Connections with .htaccess
If you’re running a website on Drupal or using the Ubercart e-commerce platform, you’re likely aware of the importance of securing your site with SSL (Secure Sockets Layer) encryption. SSL not only protects sensitive data but also helps improve your website’s search engine ranking. However, there may come a time when you need to set up SSL redirection for your Drupal or Ubercart website. In this guide, we’ll show you how to accomplish this using the .htaccess file.
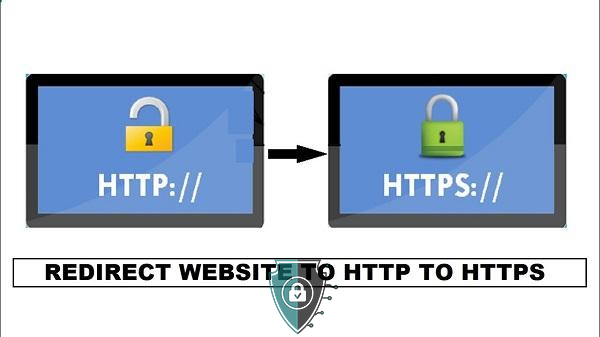
Why SSL Redirection is Important: Beorfe we dive into the technical details, let’s briefly discuss why SSL redirection is essential. SSL redirection ensures that your website’s visitors always access your site over a secure HTTPS connection, even if they initially enter the URL with “http://” instead of “https://”. This not only enhances security but also avoids potential SEO issues due to duplicate content and unsecured connections.
Prerequisites: Before you start configuring SSL redirection, make sure you have the following in place:
- An SSL certificate installed and properly configured for your website.
- Access to your website’s .htaccess file.
Step 1: Backup Your .htaccess File Before making any changes to your .htaccess file, it’s crucial to create a backup in case anything goes wrong. Simply make a copy of the file and store it in a safe location.
Step 2: Edit Your .htaccess File Now, let’s edit your .htaccess file to set up SSL redirection. You can use a text editor or a file manager from your hosting control panel to access and edit this file.
Step 3: Adding the SSL Redirection Rules Inside your .htaccess file, add the following lines of code:
RewriteEngine On
RewriteCond %{HTTPS} !=on
RewriteRule ^(.*)$ https://%{HTTP_HOST}%{REQUEST_URI} [L,R=301]
These lines of code tell the server to enable the rewrite engine, check if the connection is not on HTTPS, and then redirect the request to the same URL but with “https://” and return a 301 status code, indicating a permanent redirect.
Step 4: Save and Test After adding the code, save your .htaccess file and upload it back to your server if necessary. Now, it’s time to test your SSL redirection. Simply open a web browser and enter your website’s URL with “http://”. You should automatically be redirected to the secure “https://” version.
Congratulations! You’ve successfully set up SSL redirection for your Drupal or Ubercart website using the .htaccess file. This simple yet crucial step helps ensure the security of your website and enhances your SEO ranking. Remember to periodically check your SSL certificate’s expiration date and renew it as needed to maintain a secure online presence.
If you encounter any issues during the setup process, don’t hesitate to reach out to your hosting provider’s support team for assistance. It’s always better to seek help if you’re unsure about making changes to your website’s configuration.
Now that your website is secured with SSL redirection, both you and your visitors can browse and shop with confidence, knowing that their data is protected.
Remember, maintaining a secure website is an ongoing process, so stay vigilant and keep your SSL certificate up-to-date to ensure the continued safety of your online presence. Happy redirecting!
Introducing RunSSL.com: A Fresh Start to Secure Your Online Journey
Introduction:
Change is the only constant in life, and we’re excited to share a big change with you. After thoughtful consideration and with a commitment to provide you with even better services, we’re rebranding from GoeSecure.in to RunSSL.com. This change reflects our dedication to helping you secure your online presence effectively and effortlessly.
Why RunSSL.com?
You might be wondering why we chose the name “RunSSL.com.” Well, it’s not just about SSL certificates; it’s about running your online journey with confidence. Let’s delve into what this transformation means for you.
Our Core Products Remain Unchanged:
Rest assured, our core product offerings remain the same. We continue to provide you with top-notch SSL certificates, SiteLock security, CodeGuard backup, and TrustedSite certification. Your online security is our top priority, and these services are designed to fortify your website’s defenses.
What’s New at RunSSL.com:
- 24/7 Support Center: We understand that your online presence requires round-the-clock support. That’s why we’re introducing a dedicated support center, ensuring that you have the assistance you need, whenever you need it.
- Affiliate Program: We’re thrilled to introduce our affiliate program, designed to reward you for spreading the word about RunSSL.com. Join our community and earn while you advocate for online security.
- Enhanced User Experience: We’ve revamped our website and user interface to make it even easier for you to navigate and find the solutions you need. Your online security journey starts with a seamless user experience.
Our Commitment:
Our commitment to your online security and satisfaction remains unwavering. With the rebranding to RunSSL.com, we’re renewing our promise to deliver reliable, secure, and affordable services to our valued customers. Your trust has been the cornerstone of our journey, and we intend to build upon it.
Get in Touch:
Have questions about the rebranding or our services? Reach out to us at [info@runssl.com] or [+918755875533]. We’re here to assist you, just as we always have been.
Conclusion:
As we transition from GoeSecure.in to RunSSL.com, we’re excited about the future and the opportunities it brings to enhance your online security journey. Your security, trust, and satisfaction are at the heart of this transformation. Thank you for being a part of our journey, and here’s to a secure online future with RunSSL.com.
Welcome to RunSSL.com, where security meets simplicity!